Quantcast
Channel: Eltima Software – Knowledge Base
Viewing all 959 articles
Browse latest View live

Playlists

$
0
0

In Elmedia, files can be organized into playlists, which is especially helpful when you have many files. You can create a playlist to suit some occasion, to group specific kind of files (for example, your favorite pop songs), etc.. Elmedia supports standard playlists.

How to create a new standard playlist
Drag and drop files to Elmedia player.
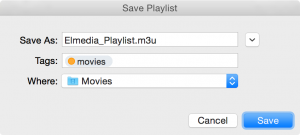
Go to the main menu –> File –> Save Playlist:

Type the desired playlist name in the text field, assign tags and set the destination path.
The click Save button.

Saving playlists may be useful for backup purposes. When you create a new playlist, export it to your Mac’s hard drive. Now, if you accidentally delete this playlist from Elmedia, you can easily restore it by importing from your hard drive.

You can also export a playlist and then import it to Elmedia Player on a different Mac, so that you can have the same playlist on both Macs.
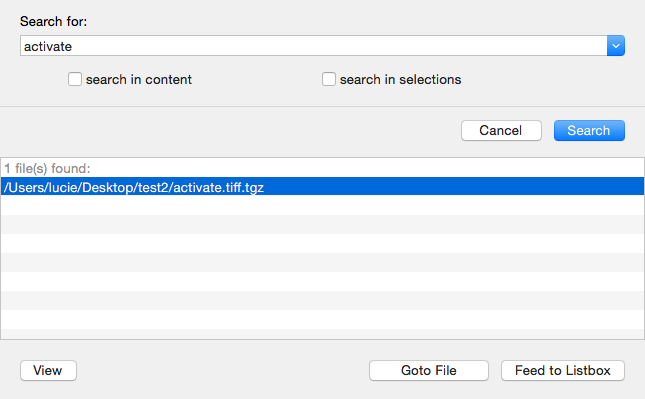
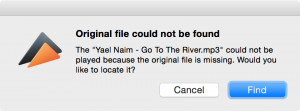
Tracks from the imported playlist will be played only if they can be located by Elmedia Player on your hard drive, otherwise you will receive an error message. It happens because the imported playlist contains only the list of items (with the paths to actual files indicated), but not the actual files themselves. If you receive an error message, which means that the file was not located for some reason (for example, its path is different), you can locate this file manually by clicking “Find” button:

To load (import) a playlist, choose “Load Playlist” option from the main menu. In the invoked window browse to the required playlist and click “Open” button.

How to manage a playlist
1. To change playlist settings, choose “Playlist” tab in Preferences.
elmedia5_4_preferences_playlist
2. To remove an item from playlist, right-click it in the list and choose “Delete” option from the context menu. Or choose “Remove from Playlist” option from Main menu. This does not remove the item from your hard drive.

3. There are two modes of files playback – Repeat and Shuffle:

1. Repeat may have one of the three states: “Repeat Off”, “Repeat One” (the current file will be played continuously), “Repeat All” (all files in your playlist will be repeated).
2. Shuffle option plays playlist items randomly.


Known Issues

$
0
0
Problems that may arise while downloading online movies:
  • At this moment, Elmedia supports capture of files transferred only over “plain” RTMP. Capture of files transferred over RTMP Tunneled (RTMPT), RTMP Secure (RTMPS) and RTMP Encrypted (RTMPE) is not currently supported by Elmedia.
  • Currently, Microsoft Silverlight streaming video cannot be captured by Elmedia.
  • Currently Elmedia does not feature downloading of live RTMP stream (e.g. stream from web cameras, etc.)
  • At the moment, Elmedia PRO does not support download of MPEG Transport Stream videos.
  • WebKit engine (which is used by Elmedia for correct work of some of its options, like rendering web pages), provided in Mac OS X package of version 10.4.X and less, does not support all HTML5 features. Due to this fact, web pages that contain HTML5 elements in their code, will be displayed incorrectly by Elmedia, including video on those pages. Therefore, media files may not be available for downloading via Elmedia. However, this problem cannot be an applicable reason for a refund, as it is not Elmedia’s fault, but a question of HTML5 support provided by older Mac OS X versions.
  • Sometimes files duplication is possible in the list of files which are available for downloading with Elmedia. It happens when files have additional parameters in their names (like the date or time). As these parameters change, the links change correspondingly and Elmedia treats them like the links to different files, though practically the file is always the same.
  • Sometimes a video is provided by a website in segments, but not in a single stream. Such videos can be downloaded by Elmedia, however the downloaded files cannot be subsequently played.

Problems that may arise while playing back FLV files

  • Elmedia quits unexpectedly when playing some FLV files:
  1. Perhaps you are playing files saved at Mounted Shared Resource. We recommend playing FLV files which are located on your local hard drive. If you need to play the files from Mounted Shared Resource or if our application quits in spite of the fact you are playing FLV files locally, please follow these steps: go to Preferences, uncheck “Enable Flash Local Security” option, restart the application.If Elmedia still quits, write to support@eltima.com supplying the details.
  2. If Elmedia quits running on Intel-based Mac please make sure that “Open using Rosetta” option is disabled. To check this, go to Finder, search for Elmedia Player.app, invoke context menu and select “Get Info” –> General.
  • While playing for the first time an FLV file, the file’s total length may first be 00:00. In a while, the correct movie length will be displayed. You cannot move a movie forward/back until the correct length is displayed. This occurs because it may take Elmedia some time to display the movie length; or if an FLV movie was not properly created, and its total length is not available.

Downloading YouTube Playlists

$
0
0

You can download YouTube playlists, setting video conversion into different formats, including MP3, if you don’t need the video itself.

In its free version, Airy will downland only the first two (2) items of the playlist. The rest of tracks will be queued until you get the licensed version. To be able to use Airy without any limitations, purchase the license: http://mac.eltima.com/youtube-downloader-purchase.html

Note:
Currently, Airy does not download age-restricted videos from channels like Vevo. Also, videos marked as deleted cannot be downloaded as well. Such videos will be skipped, and you will get the corresponding message:

To download a playlist, do the following:

1. Copy the YouTube playlist URL and paste it into Airy window.

2. Be patient, parsing may take some time.

3. Once parsing is over, choose the format to save the files into:

4. Finally, click Download.

Files are saved into Downloads folder of your Mac. You can easily browse to this folder by clicking the magnifying glass icon in Airy window once the download is completed. In Preferences you can set the destination folder for all downloads, as well as for separate files.

Typeeto

Subtitles

$
0
0

What if:

1. Subtitles display incorrect characters…

If you are loading an external subtitles file but some of the characters are being displayed incorrectly, please first make sure that the suitable font is set. By default, WenQuanYi Micro Hei is used. This is an all-purpose font which allows displaying the majority of subtitles properly, including Chinese ones. But sometimes subtitles may be displayed incorrectly even if WenQuanYi Micro Hei is set. Try setting another font in Preferences and restart the program. screen For example, to display subtitles in Arabian correctly, set Arial or Arial Unicode MS. Do not forget to restart the program.

2. Subtitles are not loaded automatically…

2.1 Please make sure that the subtitles file is placed in the same directory as the video. If not, try moving the subtitles file to the same directory where the video is placed. Do not forget to restart the video.

2.2 If the above step does not help, try tuning “Autoload subtitles files” option in Preferences. Restart the video.

3. Open the subtitles file manually using one of the following ways:

3.1 View → Subtitles → Add from File

3.2 From the context menu: Subtitles → Add from File…

3.3 File → Open…


3.4 Drag and drop the subtitles file on the application icon in Status bar or on Elmedia’s main window.

Commander One for Mac OS X

Create New TextEdit File

$
0
0

To create a new TextEdit file, go to the main menu: File –> New File

menu_file

Set the file name:

A new TextEdit file will be created.

Create New Folder

$
0
0

To create a new folder, go to the main menu: File –> New Folder

menu_file

Type the desired name for the new folder and click OK.

new_folder

A new folder will be created.


Copy Files

$
0
0

To copy files, do the following:

1. Set the source folder (directory) in one pane, and the target one in the other.
2. Select the files you want to copy with the mouse.
3. Press F5 or choose the Copy option from the right-click menu.

copy

4. Click OK. The file will now be copied.

Duplicate Files

$
0
0

To duplicate files, go to the main menu: File –> Duplicate

menu_file

Make Symlink

$
0
0

A symbolic link is a file pointing to another file.
For example, you can create a symbolic link in your home directory that points to a directory on your external drive.

To make a symlink, go to the main menu: File –> Make symlink

menu_file

Edit Files

$
0
0

Q: How do I edit text files?
A: Follow these steps:

    Select the file you want to edit.
    Press F4 or choose the Edit option from the menu (File).
screen
    The default editor will be launched.
    You may define a different editor in Preferences. Screen

What’s New in This Version

$
0
0

Airy for Mac 2.x
Build 2.0.65 [Released: 18th March 2015]

  • Added: Japanese localization
  • Improved: support for 60 fps videos
  • Fixed: erroneous download and conversion of MP3 files on Macs running OS X 10.9 Mavericks or lower
  • Fixed: several cases of erroneous download:
    - if the file name contained special characters, like / ? : ‘ # . etc.;
    - if the protocol type (http:// or https://) was not specified in the URL;
    - if the playlist contained identical links.

Compress Files

$
0
0

Select the files you want to pack.

Choose the Compress Selected File(s) option from the right-click menu.

The archive will appear in the same pane.

To set the default archiver and to tune the archiver’s settings, go to Preferences:

If you need to pack files and move the archive to the target pane simultaneously, follow these steps:

1. Set the source folder (directory) in one pane, and the target one in the other.
2. Select the files you want to archive and move.
3. Click the Archive toolbar button.
4. Set the archiver type and customize compression settings:

5. The archive will appear in the target pane.

Rename Files

$
0
0

Select the file you want to rename.
Choose the Rename option from the menu (File).


Uncompress Files

$
0
0

Select the archive you want to unpack.

Choose the Uncompress File option from the right-click menu:

The unpacked files will appear in the same pane.

View File Info

$
0
0

To view file info, click the Get info toolbar button.

You will get the profound file info, such as size, creation date, sharing and permission rights, etc.

View Folder Size

$
0
0

To view folder size, go to File –> Folder size:

This option works in Full View mode only:

Search for Specific Files

$
0
0

One can use enhanced search option not only across multiple local drives and archives, but even on FTP servers.

To search for specific files, click the Search file toolbar button. Tune the filters:

options!

screen results

You can either go to a search result with the “Go to File” button, or work with the whole file list by clicking “Feed to listbox“.

You can also use Spotlight engine to search for files. Spotlight is a search feature of Mac OS. Spotlight searches through local drives only.

Go to Command –> Search in Spotlight:


A text field will be invoked, where a search query can be entered.

Search results will be immediately listed.

You can either go to a search result with the “Go to File” button, or work with the whole file list by clicking “Feed to listbox“.

Connect to an FTP Server

$
0
0

Follow these steps to use the built-in FTP client:

1. Click the “FTP connections” toolbar button.
2. Set the protocol type – FTP or SFTP.

FTP stands for File Transfer Protocol. This is one of the most common ways to upload and download files from the server.
SFTP stands for Secure File Transfer Protocol and is the encrypted version of FTP. Users are advised to use the SFTP protocol to ensure that the file transmission is secure.

3. Type the server address.
4. Set the port number. By default, it is set to 21.
5. Enter your login and password. If you do not have an account on the server, check “Anonymous login“.
6. Choose the connection mode – Active or Passive.

Active and passive modes are the two modes that FTP can run in. FTP uses two channels between client and server: command and data, which are actually separate TCP connections.
The command channel is for commands and responses. The data channel is for actually transferring files.
In active mode, the client establishes the command channel, while the server establishes the data channel.
In passive mode, the client establishes both channels. In this case, the server tells the client which port should be used for the data channel.
Passive mode is generally used when the FTP server is not able to establish the data channel. One of the major reasons for this is network firewalls. Passive mode solves this by opening up both types of channel from the client side.
Active mode is set by default.
6. Set the remote path – This is the folder on the web server the file is uploaded to. Leaving the remote path filed blank means the file will be uploaded to the default folder your FTP account logs into.
7. Enable encoding to secure the connection, if needed. UTF8 will be used.

8. Click Connect.
   
Now you can work on the server like on a local hard disk – you can upload and download files, delete them, edit, etc.


To terminate the connection, click Disconnect:

Viewing all 959 articles
Browse latest View live